Back to Dreamweaver Techniques
It's important when you work with Dreamweaver to create a Dreamweaver site for each project you work on. A site groups all of your files together inside Dreamweaver and lets you do important site functions such as checking links.
A Dreamweaver site also lets you edit files in your My Documents folder and then upload the files to a remote server. This is a good choice for group projects and for class projects where you want to work on files and then "turn them in" to the outbox. If you upload your files at the end of every class period then you'll halways have a backup of your website.
Follow these steps:
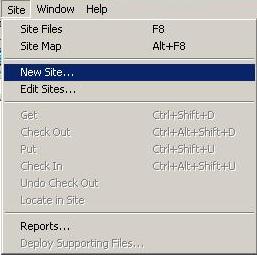
1) Start the new site by clicking on the Site menu and choosing New Site... This will bring up a series of questions
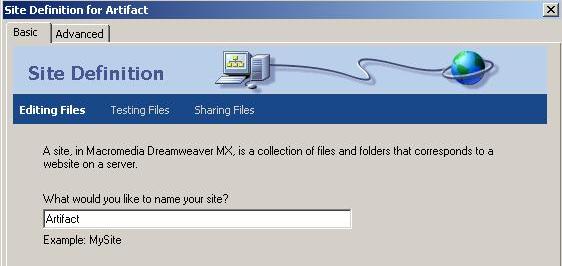
2) Enter a name for your site and click Next
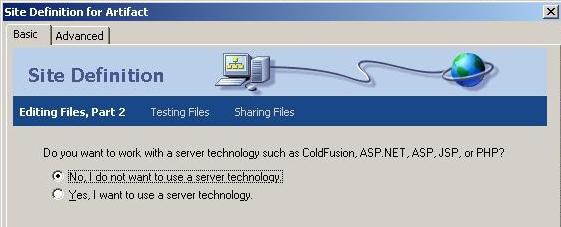
3) Choose No for a server technology and click Next
4) Choose to Edit local copies on my machine and click the yellow folder and browse to your My Documents folder, then click on Select.
.
5) Click Next
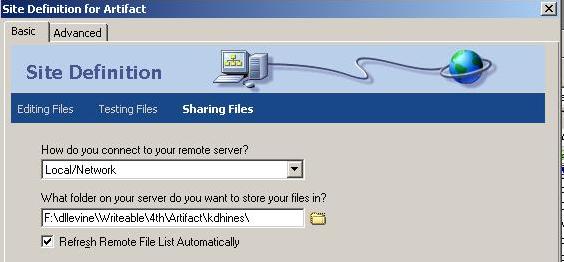
6) Choose to connect to the remote server using Local/Network and click on the yellow folder to browse to the place where you want to store your remote files. Then click Next.
If you don't want to use a remote server, choose None.
Remember, remote files are a copy of your website that other people can see. In this example, we chose Mr. Levine's outbox (F:\dlevine). Your outbox mapping may use a drive letter other than F:. If you don't have have a drive letter for the outbox, follow these steps. We have chosen the Writeable folder for 4th period and the Artifact assignment for the student kdhines.
This is a lot of words, but basically means that when this web site is uploaded to the server, the files will go in the folder for kdhines and the Artifact assignment.
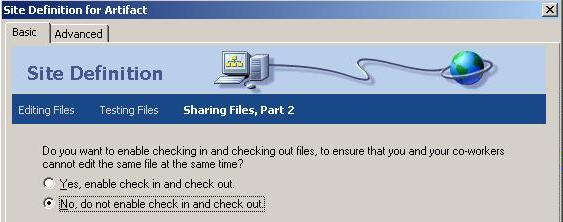
7) Unless this is a group project, choose No, do not enable check in and check out and click Next.
8) Click Done.